Publishing Vector Time Series
Publish Temporal Shapefile through GeoNode
From the folder
/opt/data/sample_data/gisdata/data/good/timeupload the fileboxes_with_date
The upload starts, but it will stop at
50%asking to the user for further inputs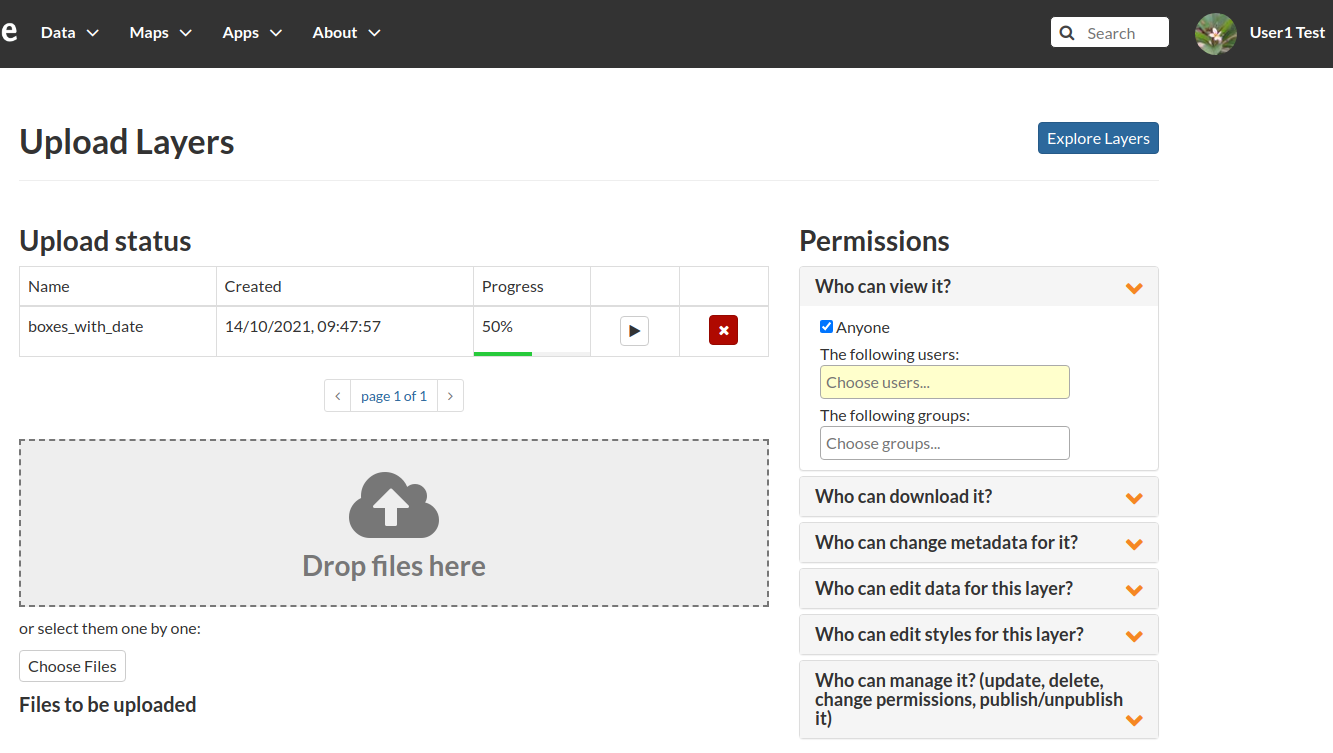
Click on the
playbutton, you will be redirected to a summary page with the list of the available temporal dimensions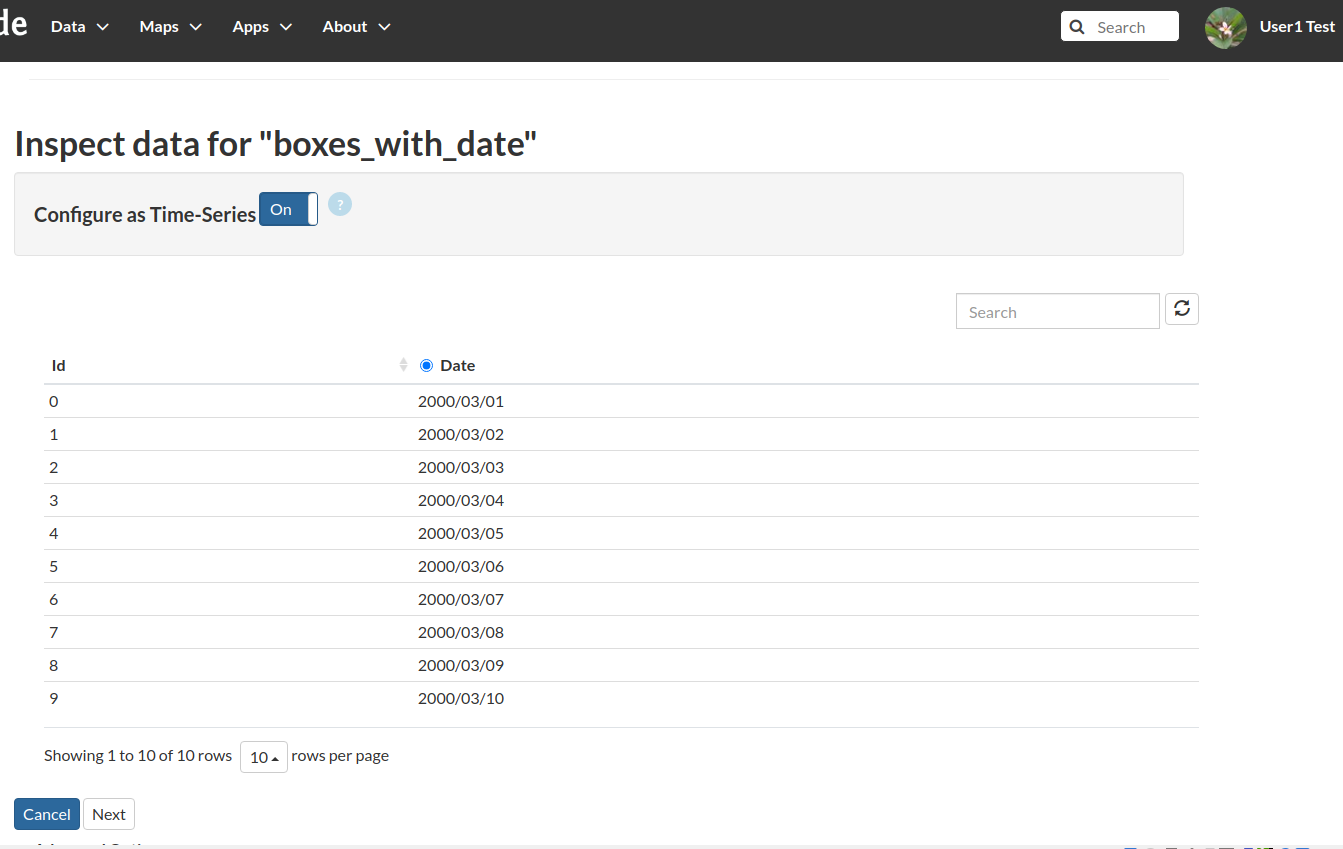
Enable the time check, select the
date fieldand click onnext; it will take some time to finalize the upload. When finished you will be redirected to the details page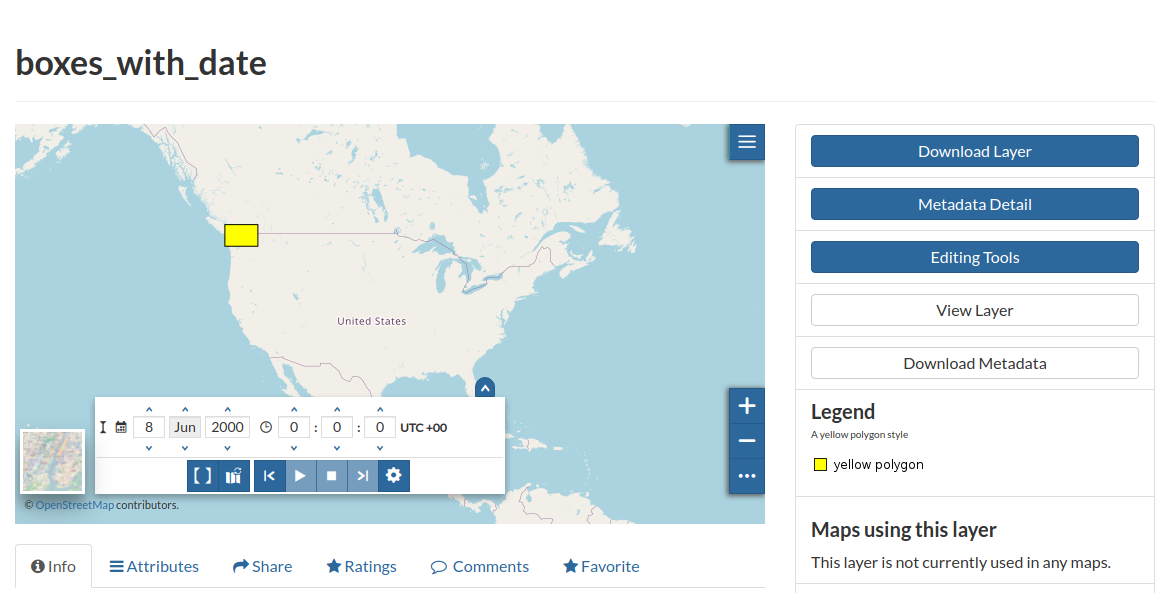
Click on
Editing Tools > Metadata > Wizardand switch to theSettingstab; you’ll notice that theHas Timecheckbox has been enabled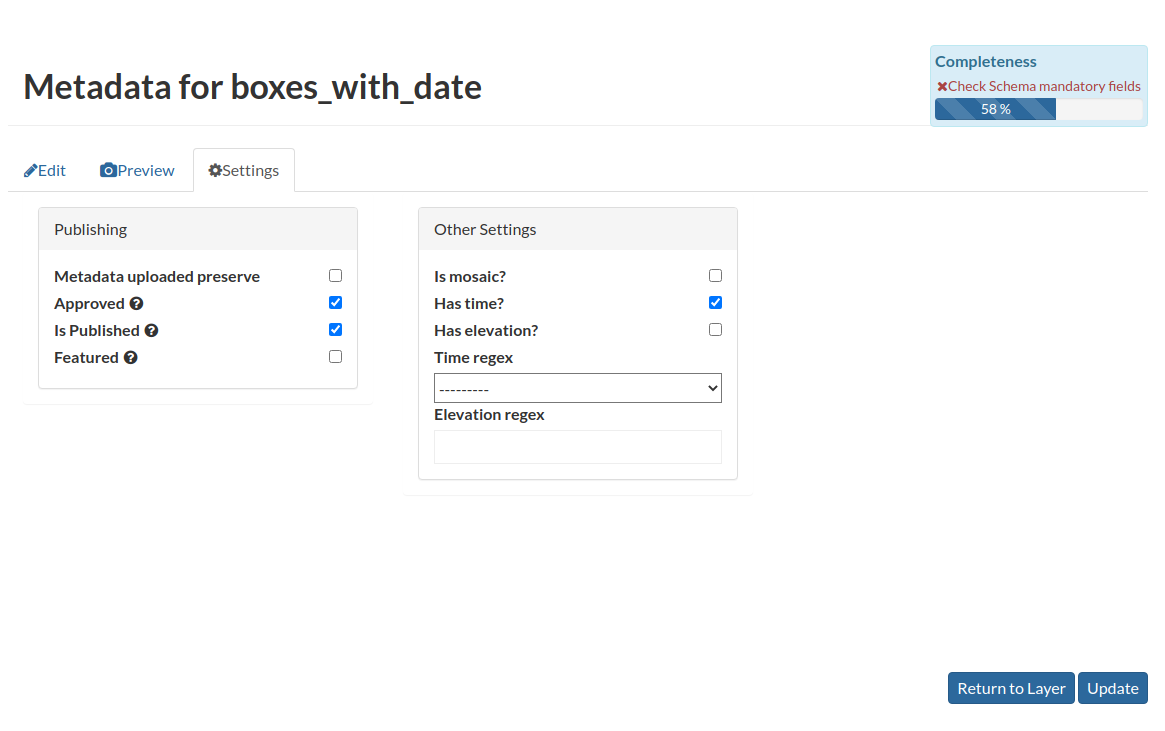
When che Has Time checkbox it enabled, GeoNode asks to the OWS Service for the time dimension values
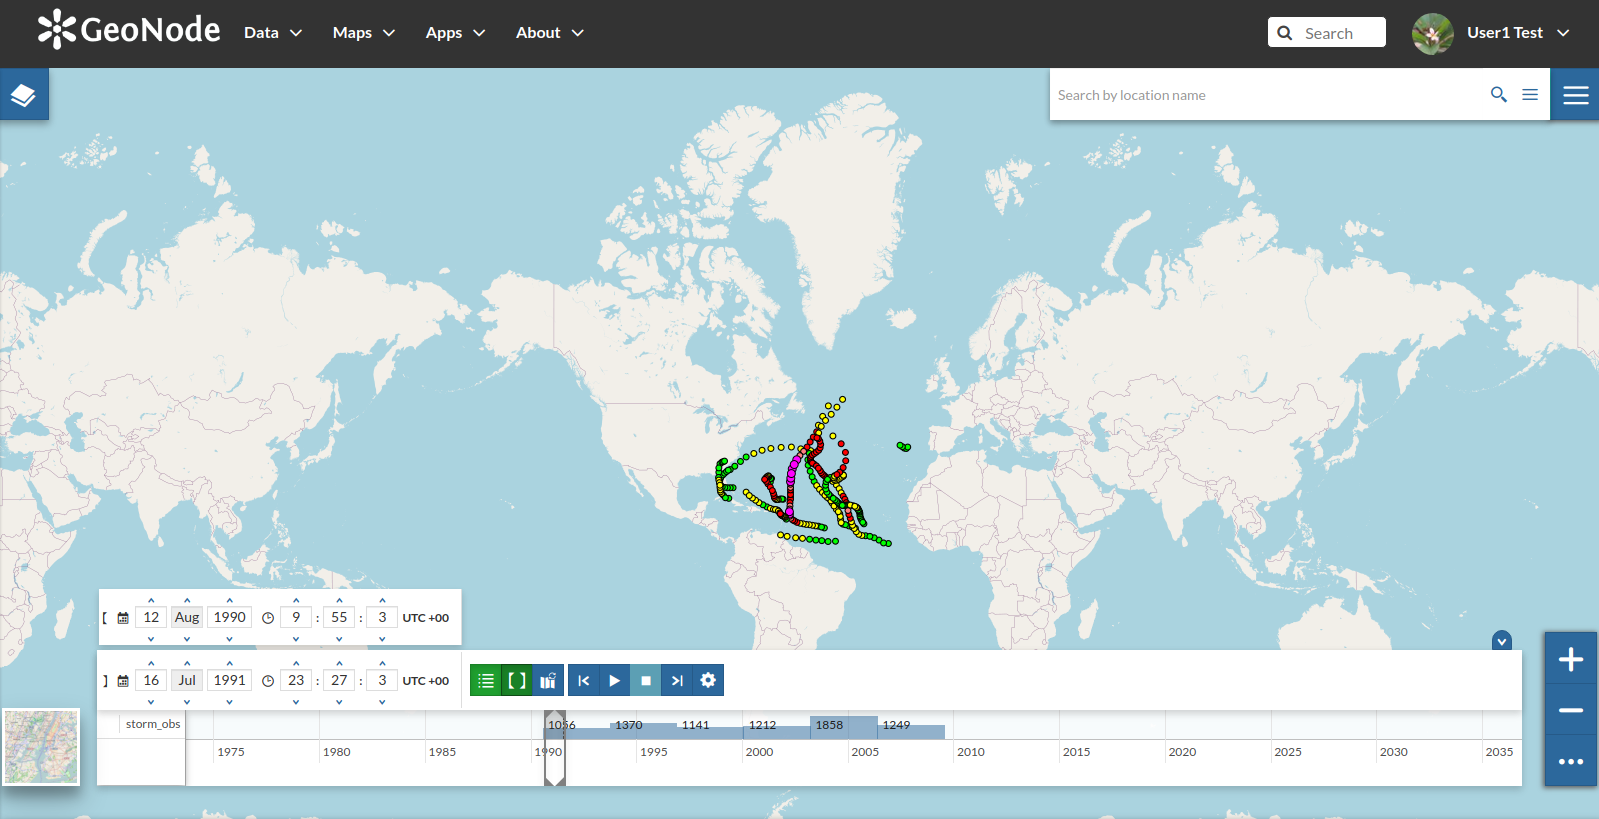
Notice the
time slidernow has been enabled on the map.
Publish Temporal Layer through GeoServer
Let’s prepare the datset first; we will restore some DB tables and create the layer on GeoServer
Open a terminal window and execute the following commands
cd /opt/data/sample_data/user_data/storm_track_sql
createdb -U postgres -O geonode storm_track_sql
psql -U postgres storm_track_sql -c "CREATE EXTENSION postgis;"
psql -U postgres storm_track_sql < storm_track_sql.db
psql -U postgres storm_track_sql -c "GRANT SELECT ON TABLE storm_obs TO geonode;"
That will create a new DB and restore a table of the historical storms from an existing dump.
We need to create the layer on GeoServer first; as an
adminmove to the GeoServer admin gui, click onData > Storesand thenPostgis Data Store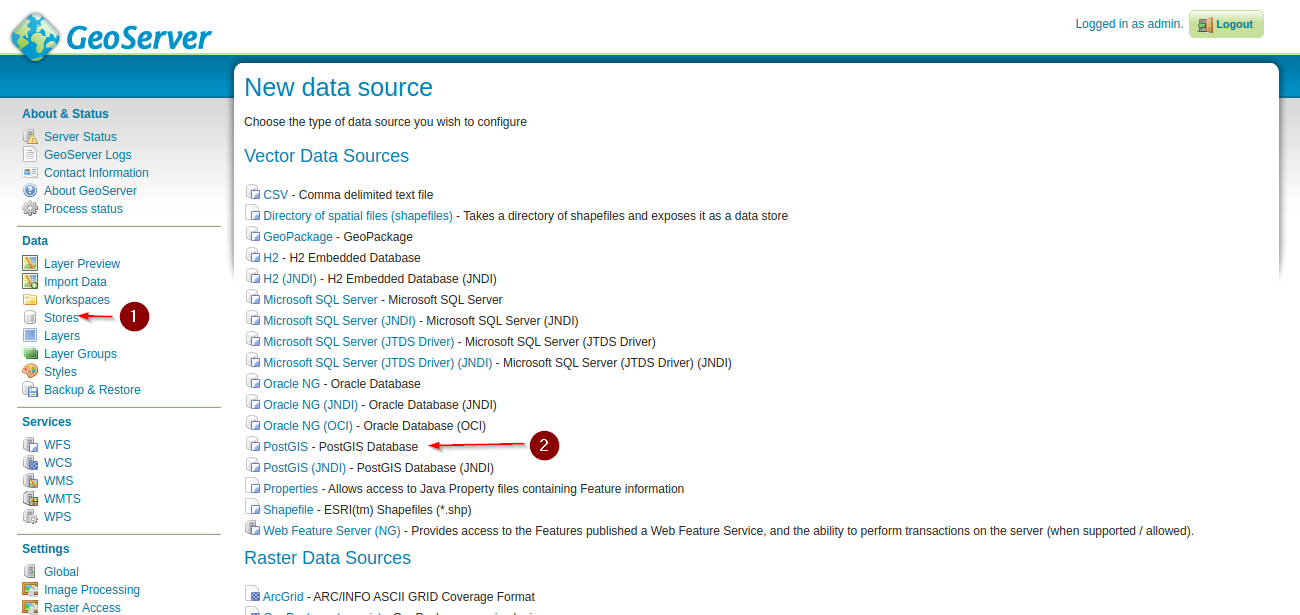
Provide the connection parameters to the new DB
Name:
storm_trackDescription:
storm_trackDatabase:
storm_track_sqlUsername:
geonodePassword:
geonode

Click on
Publishon the next window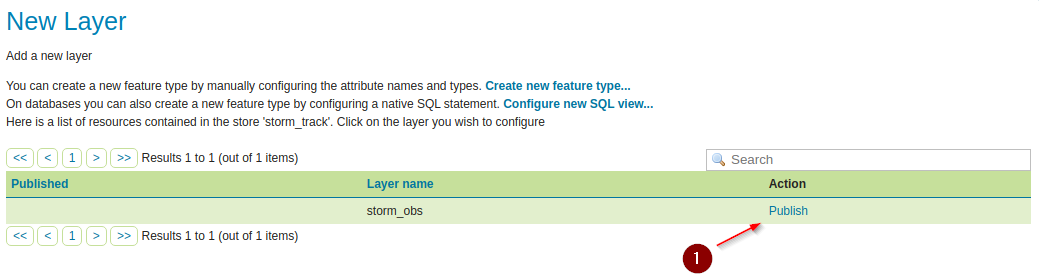
Compute the
Data Bounds
Click on the
Dimensionstab and enable theTime Dimensionas shown here below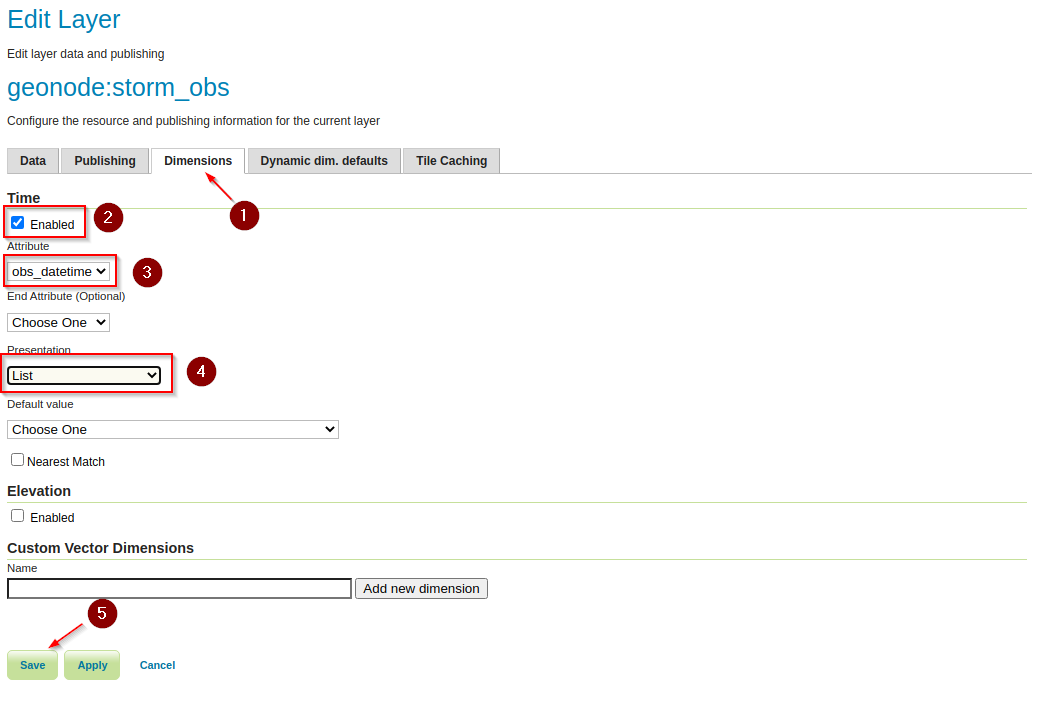
The layer is ready and published on GeoServer, we need to import it on GeoNode now
Move to the terminal window, enable the
geonodevirtual environment and move to the folder/opt/geonode; execute theupdatelayersmanagement command as followsworkon geonode cd /opt/geonode ./manage_local.sh updatelayers --skip-geonode-registered -u test_user1 -w geonode -f storm_obsThe new layer will be created on GeoNode, it will show only a single point without the
timeslider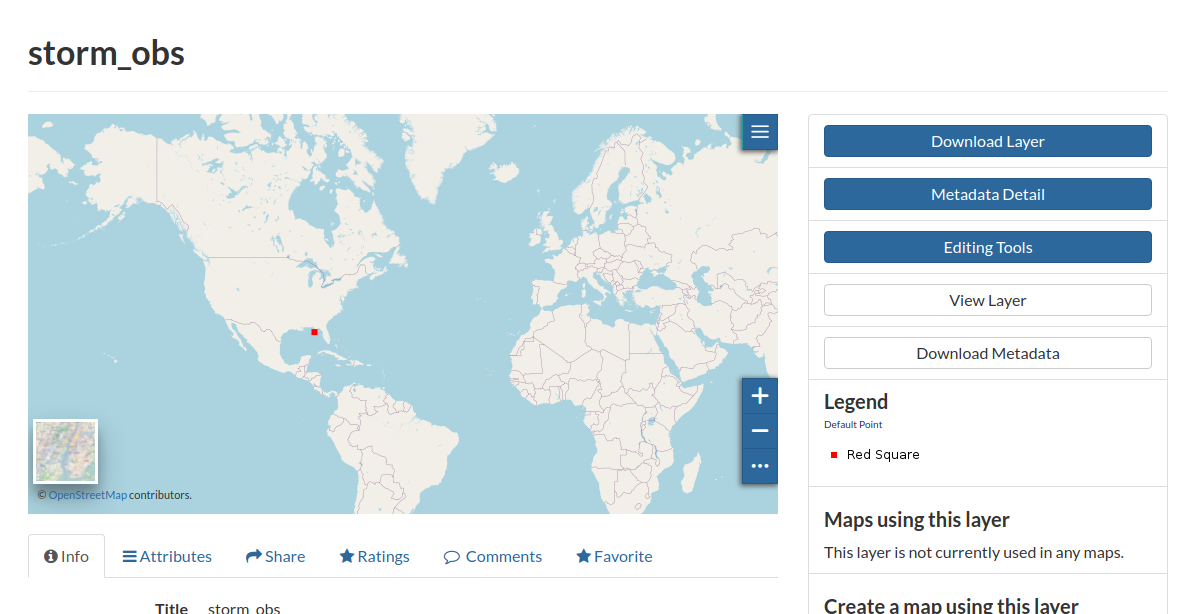
Edit the metadata and enable the
Has Timecheckbox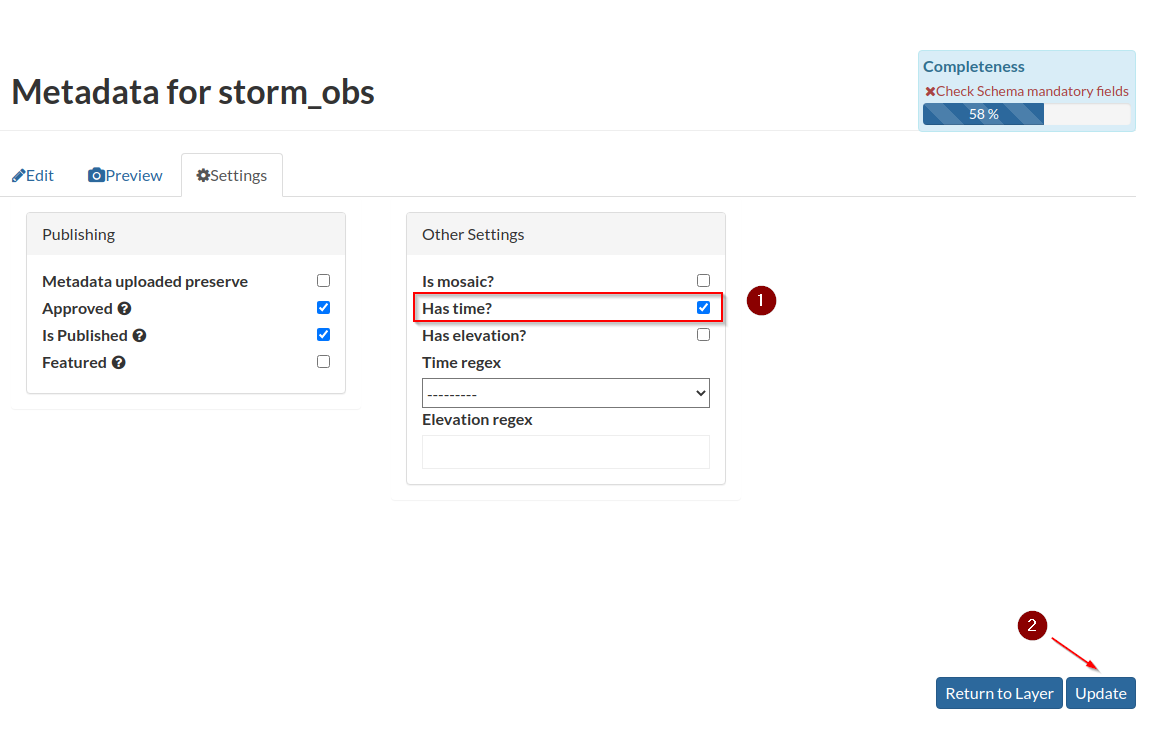
Save it and go back to the details page
Upload the
storm_obs.sldstyle file from the folder/opt/data/sample_data/pretty_maps/styles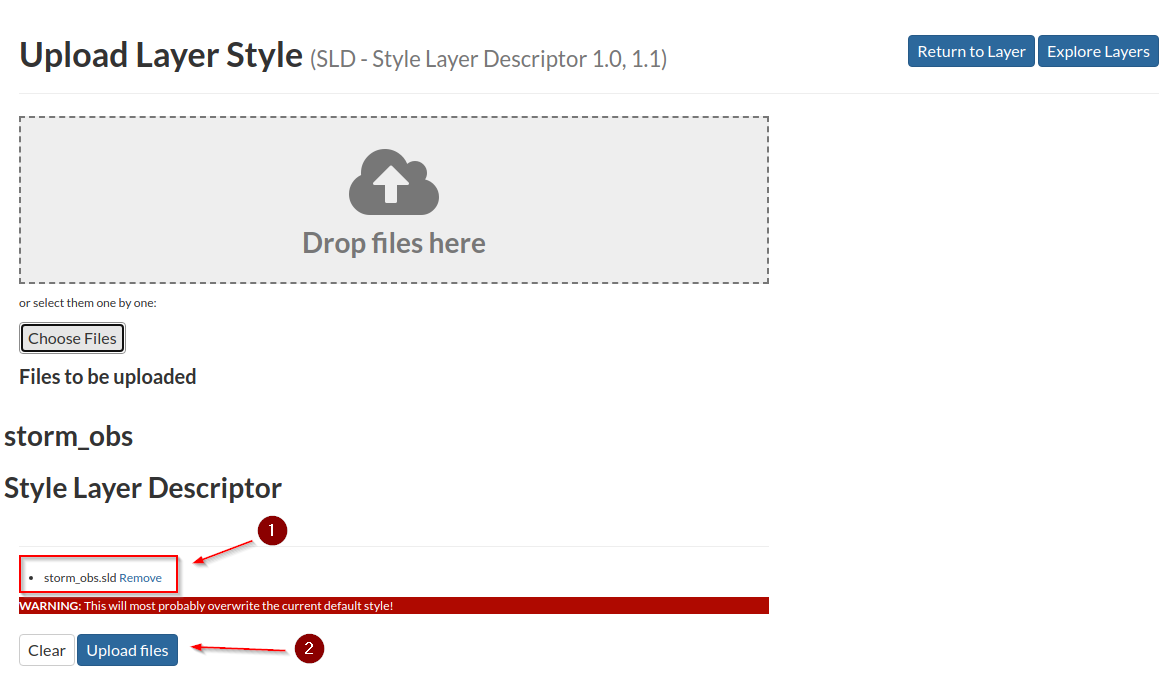
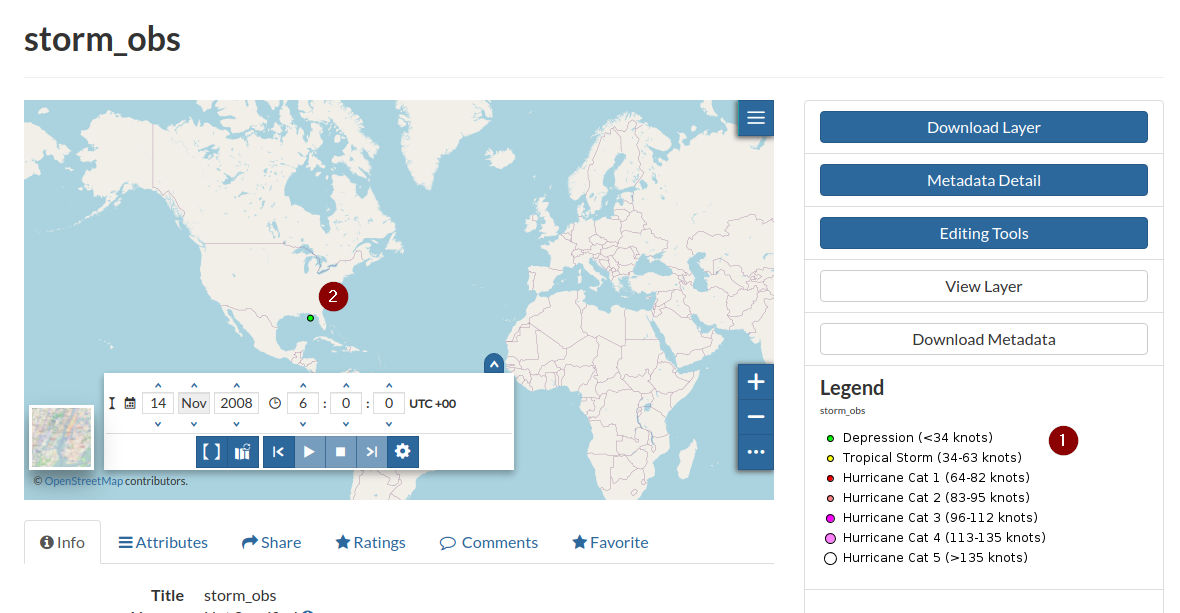
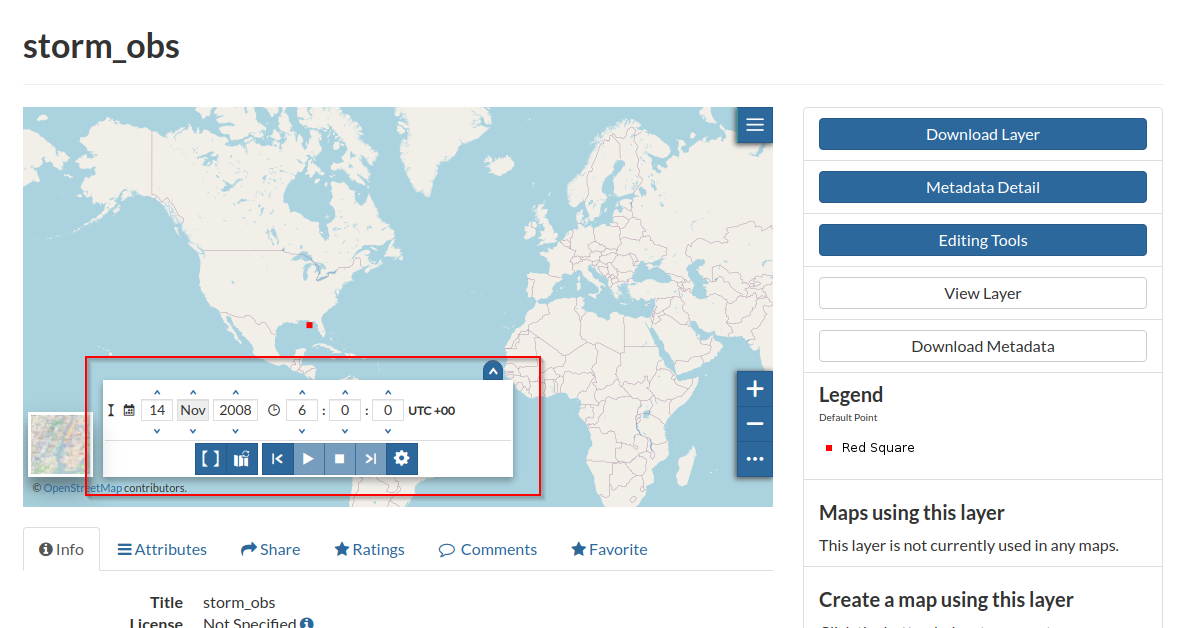
Go to the
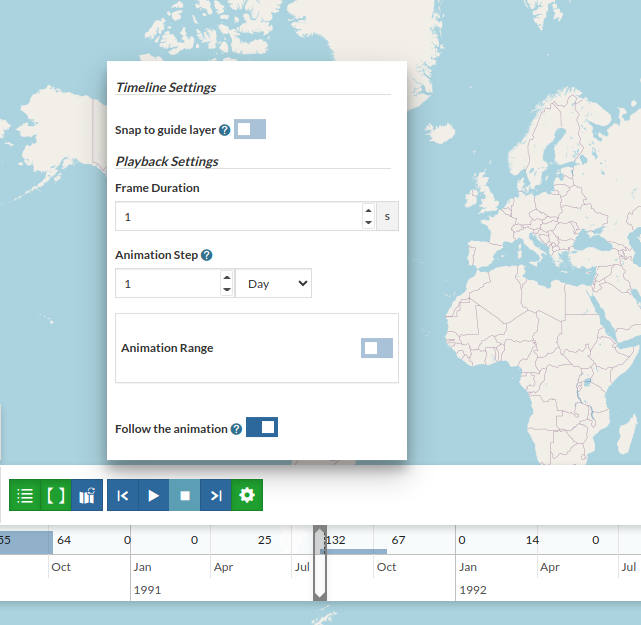
Layer View, expand thetimesliderand try to move through the valid temporal instant and intervals