Publishing data from a DB table
In this section we are going to publish on GeoNode a layer which is already present on a DB table.
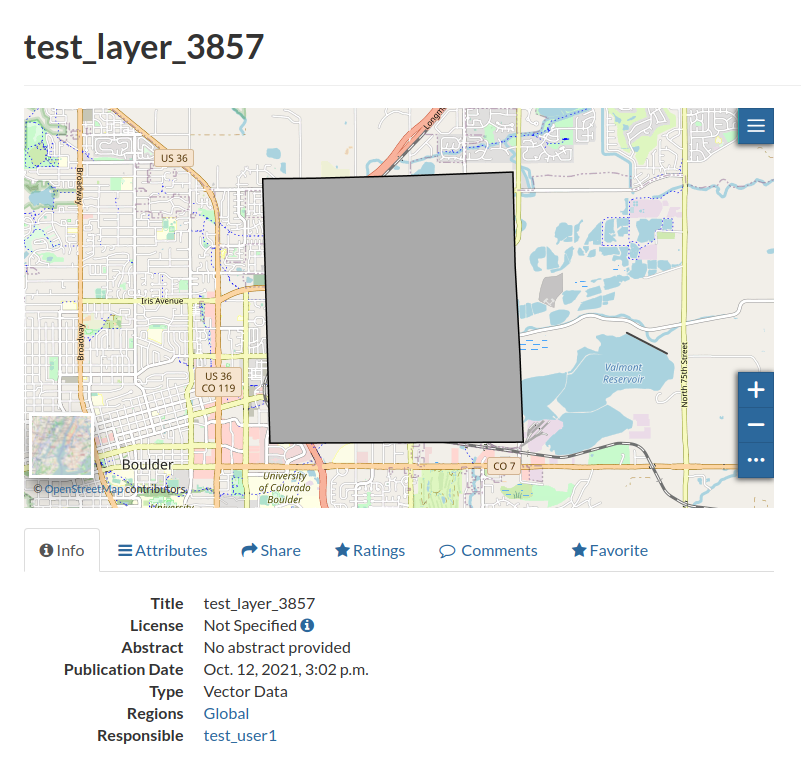
In particular those are the steps that will allow us to convert the Test Layer, the empty layer created in the previous sections, to a Mercator Projected one and publish it again on GeoNode:
Download the
Test Layeras anESRI ShapefileUse the
GDAL ogr2ogrutitlities to reproject it fromWorld Geodetic System 1984 EPSG:4326,LatLoncoordinate reference system used inGPS, toSpherical Mercator EPSG:3857,metersprojected coordinate system used for rendering maps in Google Maps, OpenStreetMap, and tiled layers in general.Use the
GDAL ogr2ogrutitlities to import the file into a local Data Base.Publish the layer on GeoServer.
Publish the layer on GeoNode.
Try to edit it again from an external client (QGIS).
Download the Layer as an ESRI Shapefile
Go to the
Test Layerdetails page, move toDownload Layer > Data > Zipped Shapefile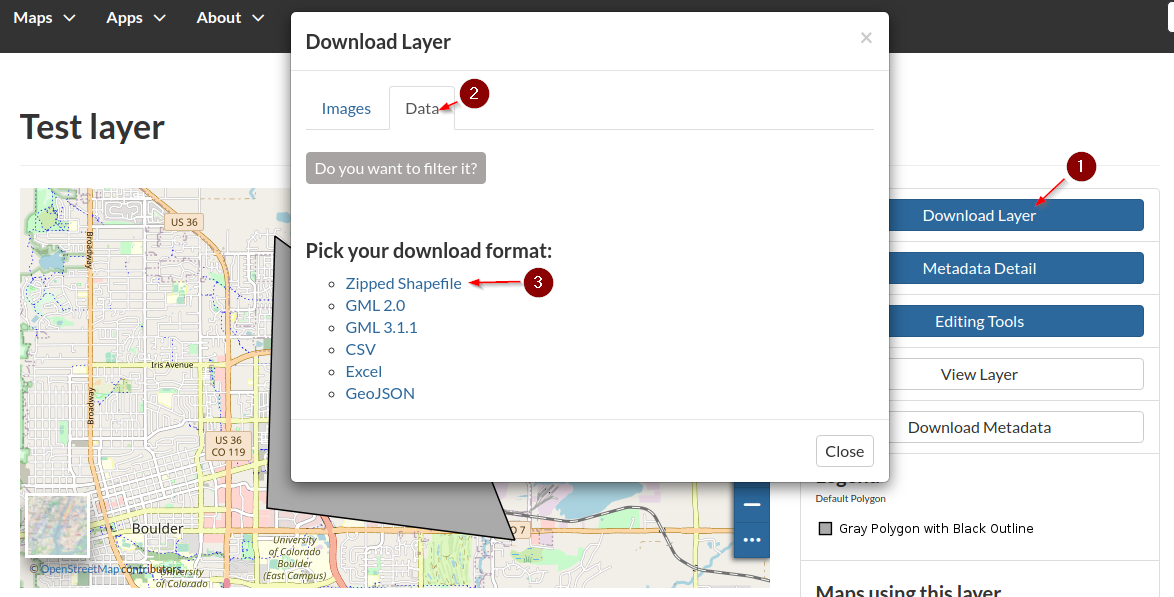
Store it on a local folder, e.g.
Downloads(this is the default target folder used by the browser)
Project to EPSG:3857
Open a terminal windows and move to the
Downloadsfolder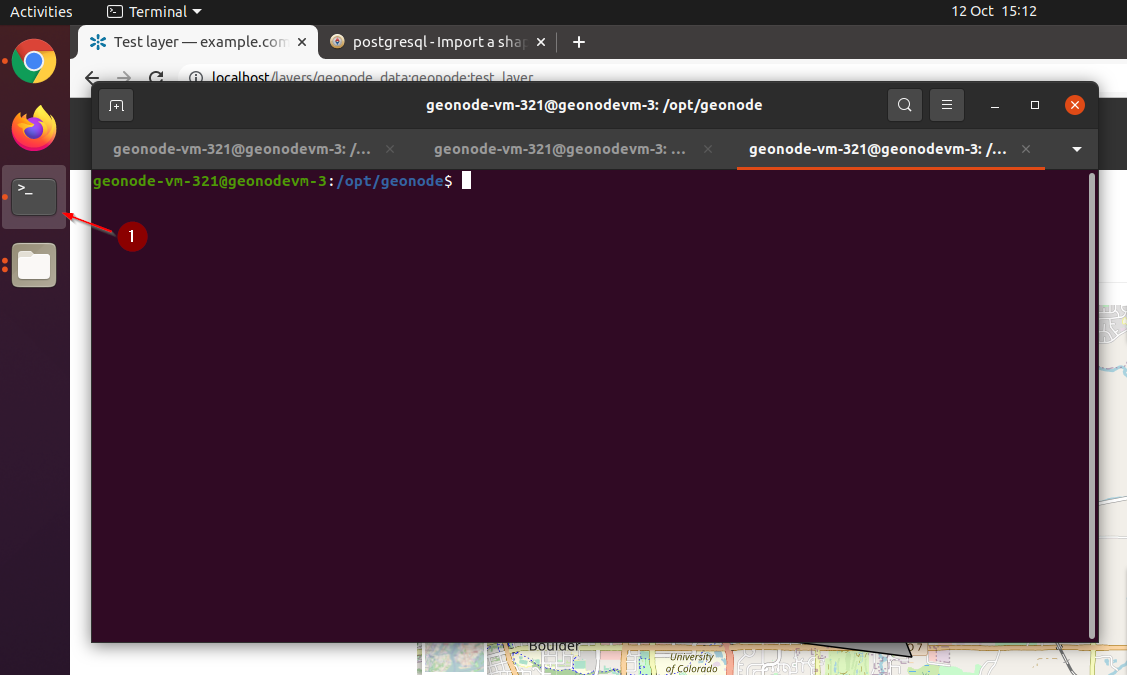
cd
cd Downloads
Create a folder named
test_layerand unzip the contents of the downloaded archive inside itmkdir test_layer cd test_layer/ unzip ../test_layer.zipUse the
GDAL ogr2ogrutitlities to reproject it fromWorld Geodetic System 1984 EPSG:4326,LatLoncoordinate reference system used inGPS, toSpherical Mercator EPSG:3857,metersprojected coordinate system used for rendering maps in Google Maps, OpenStreetMap, and tiled layers in general# ogr2ogr <target srs> <source srs> <format> <target filename> <source filename> ogr2ogr -t_srs "EPSG:3857" -s_srs "EPSG:4326" -f 'ESRI Shapefile' test_layer_3857.shp test_layer.shp
A new
Shapefilewill be created inside the same foldergeonode-vm-321@geonodevm-3:~/Downloads/test_layer$ ll total 48 drwxrwxr-x 2 geonode-vm-321 geonode-vm-321 4096 Oct 12 15:17 ./ drwxr-xr-x 3 geonode-vm-321 geonode-vm-321 4096 Oct 12 15:14 ../ -rw-rw-r-- 1 geonode-vm-321 geonode-vm-321 532 Oct 12 15:17 test_layer_3857.dbf -rw-rw-r-- 1 geonode-vm-321 geonode-vm-321 425 Oct 12 15:17 test_layer_3857.prj <-- the SRS definition file -rw-rw-r-- 1 geonode-vm-321 geonode-vm-321 300 Oct 12 15:17 test_layer_3857.shp <-- the new projected file -rw-rw-r-- 1 geonode-vm-321 geonode-vm-321 108 Oct 12 15:17 test_layer_3857.shx -rw-rw-r-- 1 geonode-vm-321 geonode-vm-321 5 Oct 12 14:10 test_layer.cst -rw-rw-r-- 1 geonode-vm-321 geonode-vm-321 531 Oct 12 14:10 test_layer.dbf -rw-rw-r-- 1 geonode-vm-321 geonode-vm-321 335 Oct 12 14:10 test_layer.prj -rw-rw-r-- 1 geonode-vm-321 geonode-vm-321 300 Oct 12 14:10 test_layer.shp -rw-rw-r-- 1 geonode-vm-321 geonode-vm-321 108 Oct 12 14:10 test_layer.shx -rw-rw-r-- 1 geonode-vm-321 geonode-vm-321 219 Oct 12 14:10 wfsrequest.txt
Publish as a DB Table
Use the
GDAL ogr2ogrutitlities to import the file into a local Data Baseogr2ogr -f "PostgreSQL" PG:"host=localhost user=geonode password=geonode dbname=geonode_data" -overwrite test_layer_3857.shp
Login into GeoServer as an
admin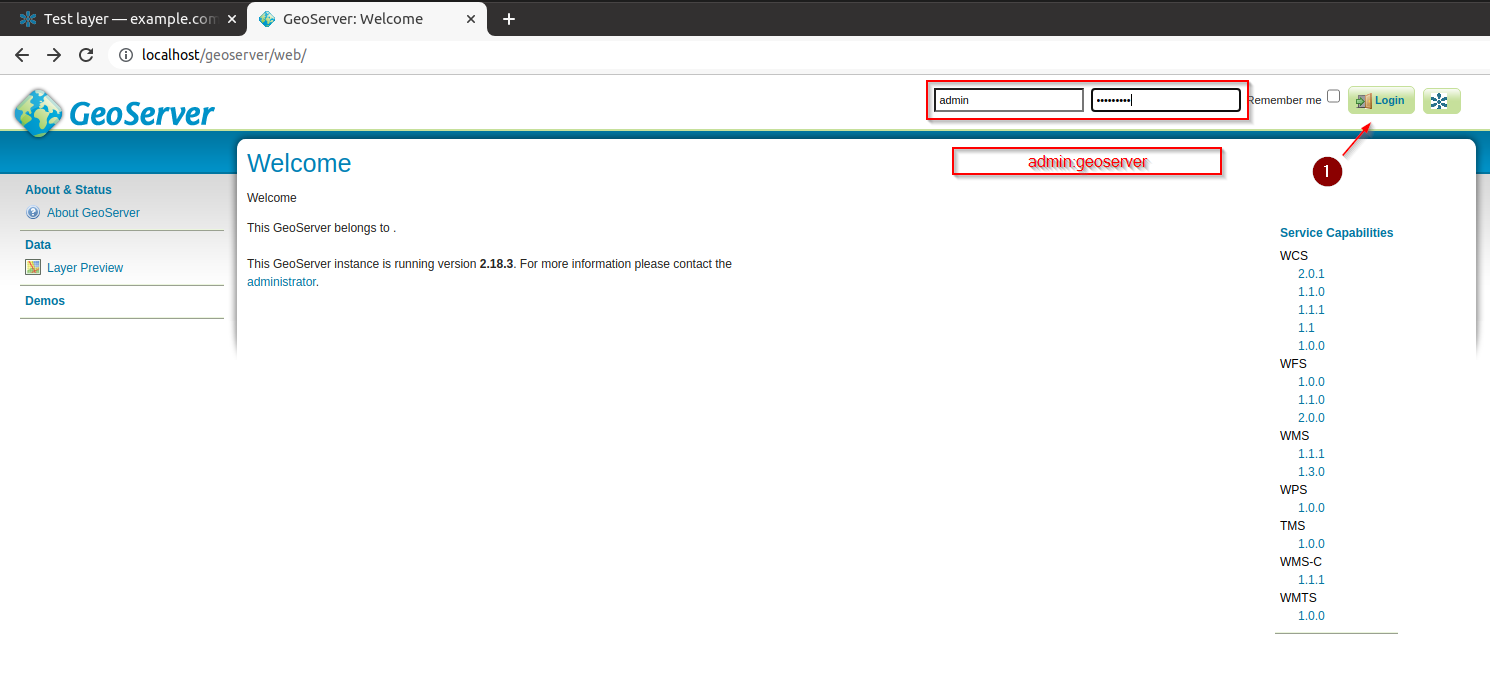
Move to
Data > Layersand click onAdd new Layer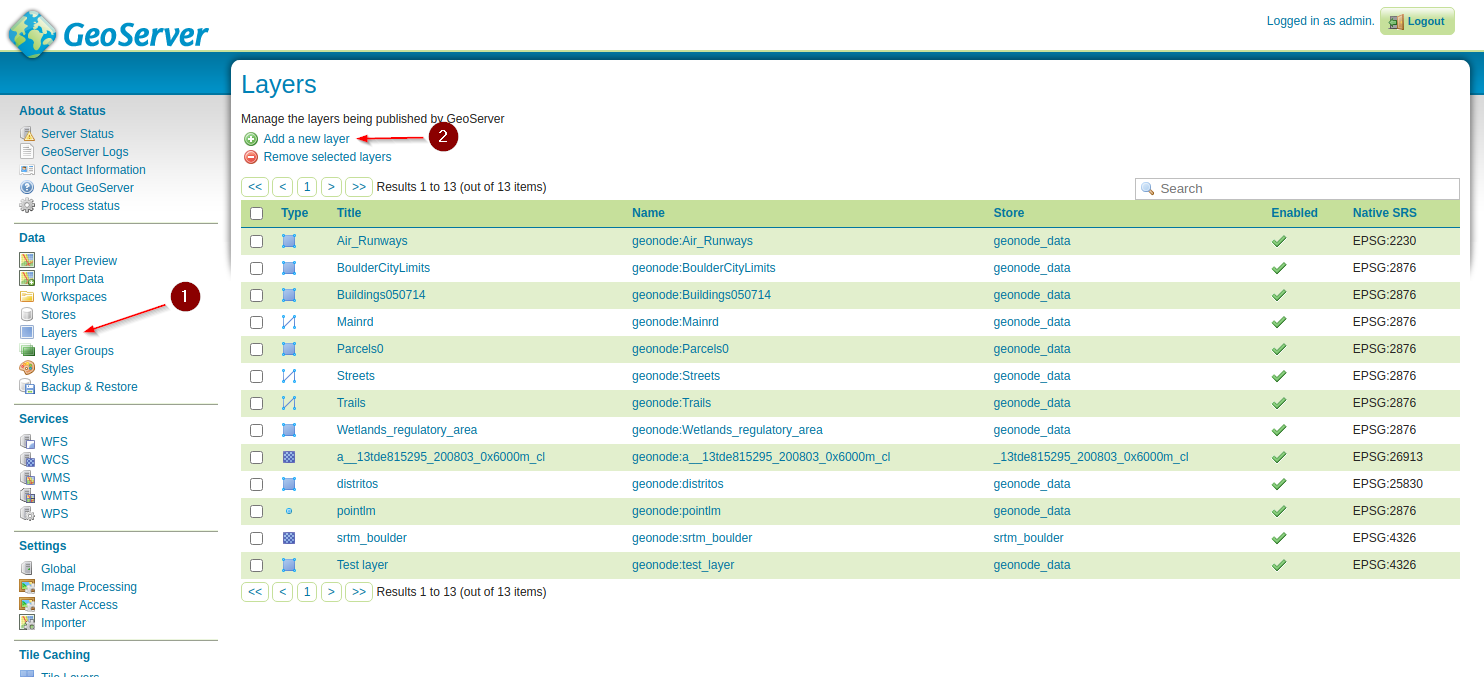
Select
geonode:geonode_data, the data store connected to thegeonode_dataDB, created and managed by GeoNode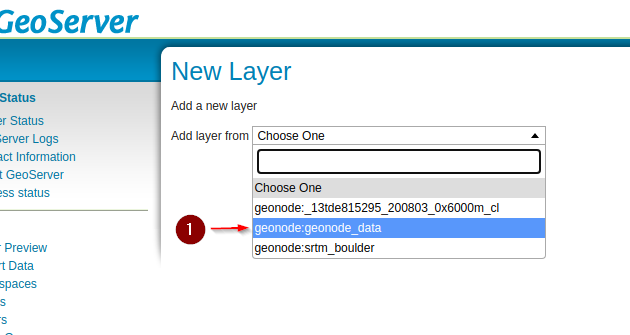
From the list of available tables, select
test_layer_3857and click onPublish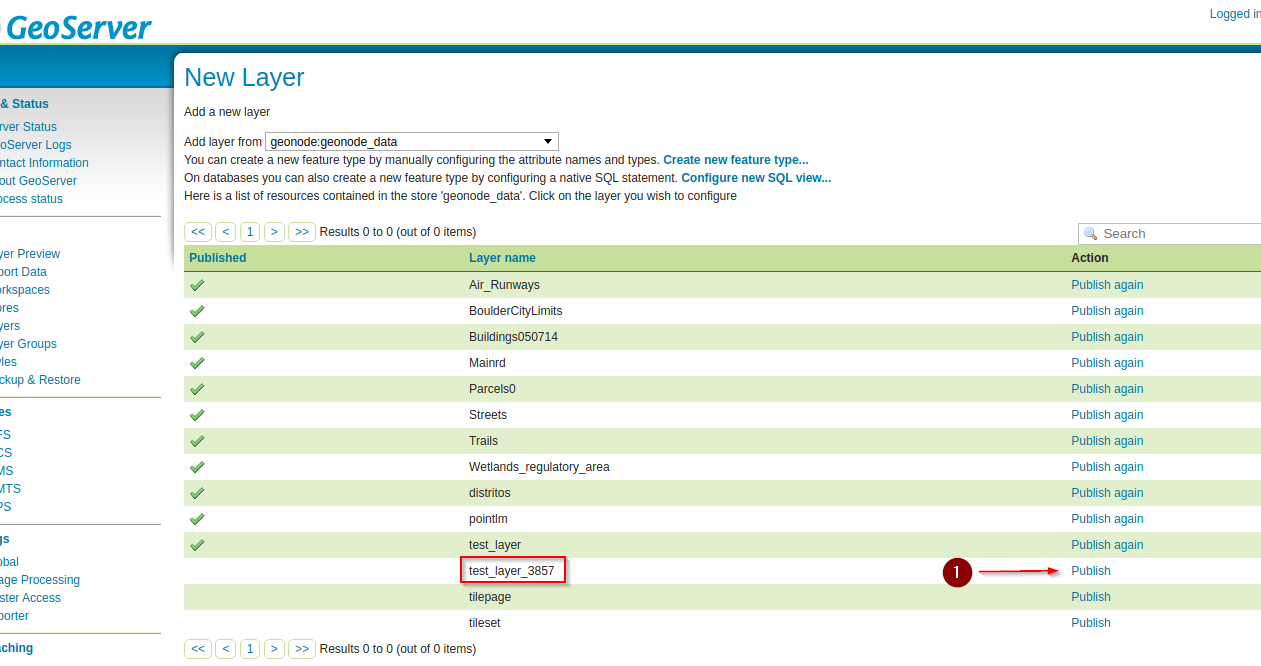
Scroll down to the
Bounding Boxessection, generate thebboxesandSave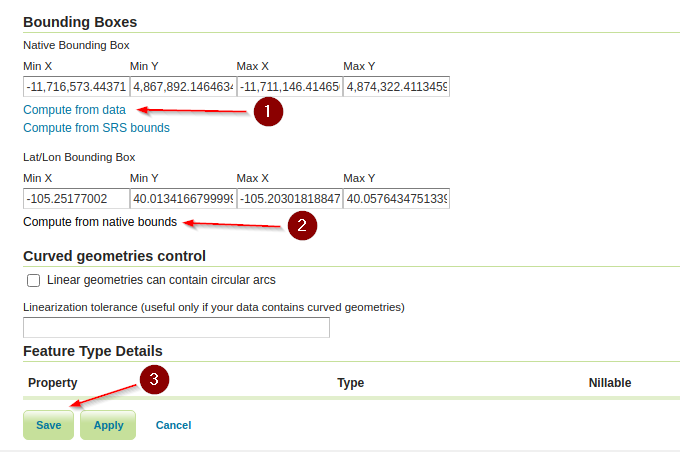
Publish the Layer into GeoNode
Go back to the terminal,
activatethegeonodevirtual environment and move to/opt/geonodeworkon geonode cd /opt/geonodeExecute the
updatelayersmanagement command in order to publish the new layer from GeoServer./manage_dev.sh updatelayers -h usage: manage.py updatelayers [-h] [-i] [--skip-unadvertised] [--skip-geonode-registered] [--remove-deleted] [-u USER] [-f FILTER] [-s STORE] [-w WORKSPACE] [-p PERMISSIONS] [--version] [-v {0,1,2,3}] [--settings SETTINGS] [--pythonpath PYTHONPATH] [--traceback] [--no-color] [--force-color] Update the GeoNode application with data from GeoServer optional arguments: -h, --help show this help message and exit -i, --ignore-errors Stop after any errors are encountered. --skip-unadvertised Skip processing unadvertised layers from GeoSever. --skip-geonode-registered Just processing GeoServer layers still not registered in GeoNode. --remove-deleted Remove GeoNode layers that have been deleted from GeoSever. -u USER, --user USER Name of the user account which should own the imported layers -f FILTER, --filter FILTER Only update data the layers that match the given filter -s STORE, --store STORE Only update data the layers for the given geoserver store name -w WORKSPACE, --workspace WORKSPACE Only update data on specified workspace -p PERMISSIONS, --permissions PERMISSIONS Permissions to apply to each layer --version show program's version number and exit -v {0,1,2,3}, --verbosity {0,1,2,3} Verbosity level; 0=minimal output, 1=normal output, 2=verbose output, 3=very verbose output --settings SETTINGS The Python path to a settings module, e.g. "myproject.settings.main". If this isn't provided, the DJANGO_SETTINGS_MODULE environment variable will be used. --pythonpath PYTHONPATH A directory to add to the Python path, e.g. "/home/djangoprojects/myproject". --traceback Raise on CommandError exceptions --no-color Don't colorize the command output. --force-color Force colorization of the command output../manage_dev.sh updatelayers --skip-geonode-registered -u test_user1 -w geonode -f test_layer_3857
Verify that the new layer has been created on GeoNode and it belongs to
test_user1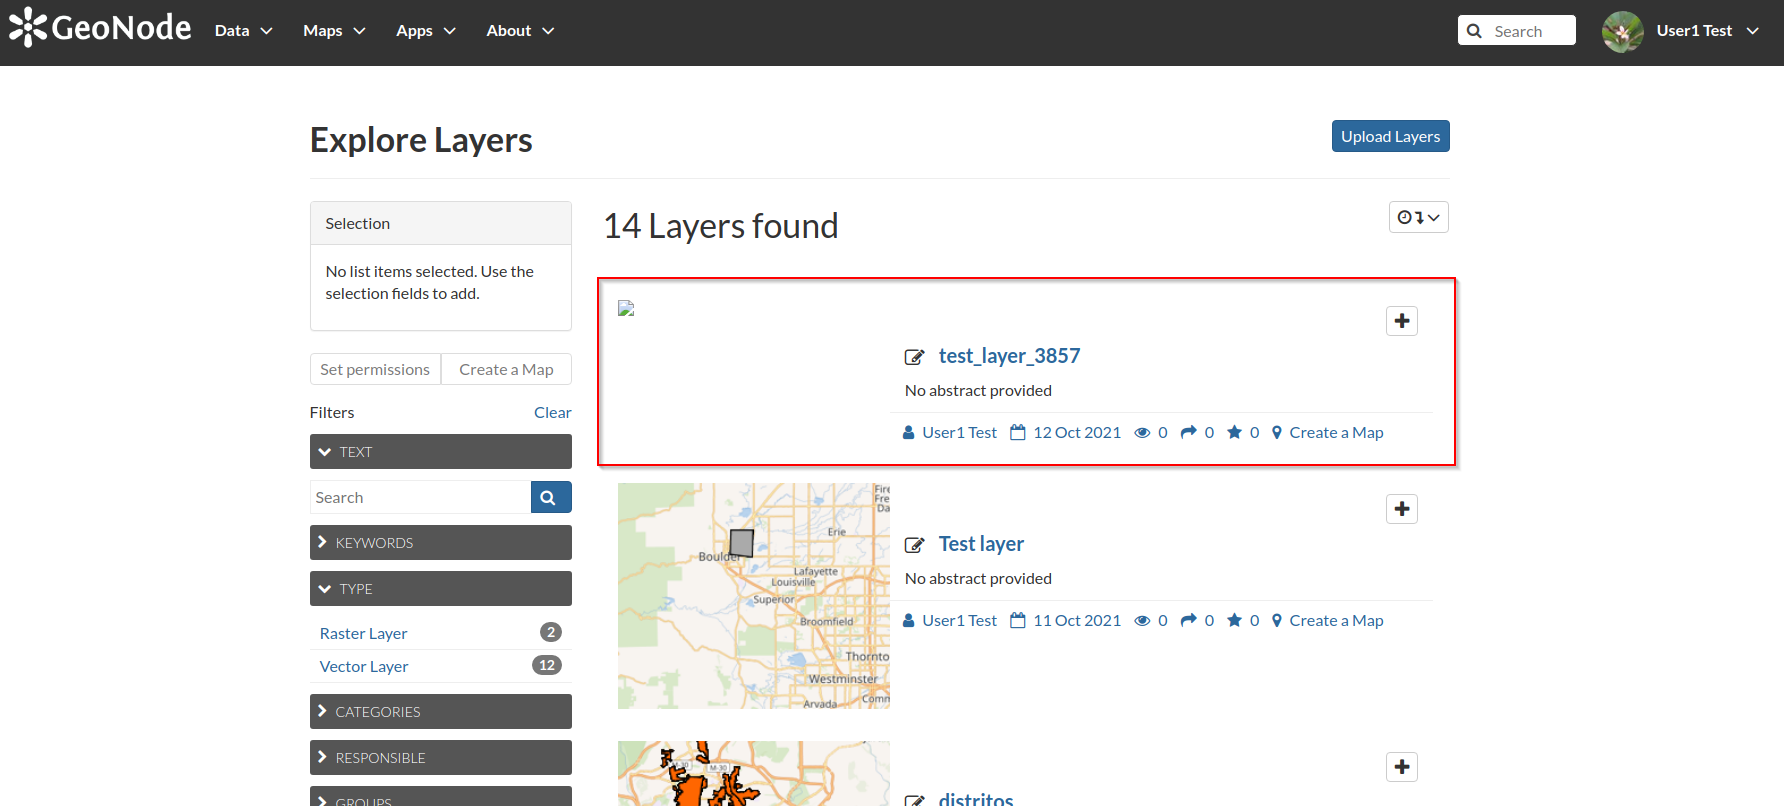
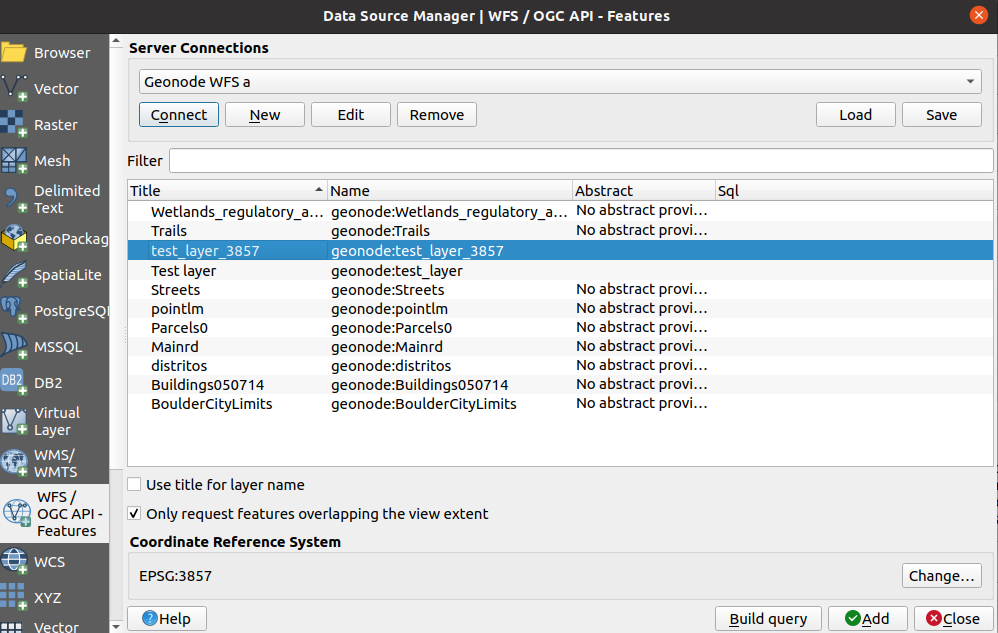
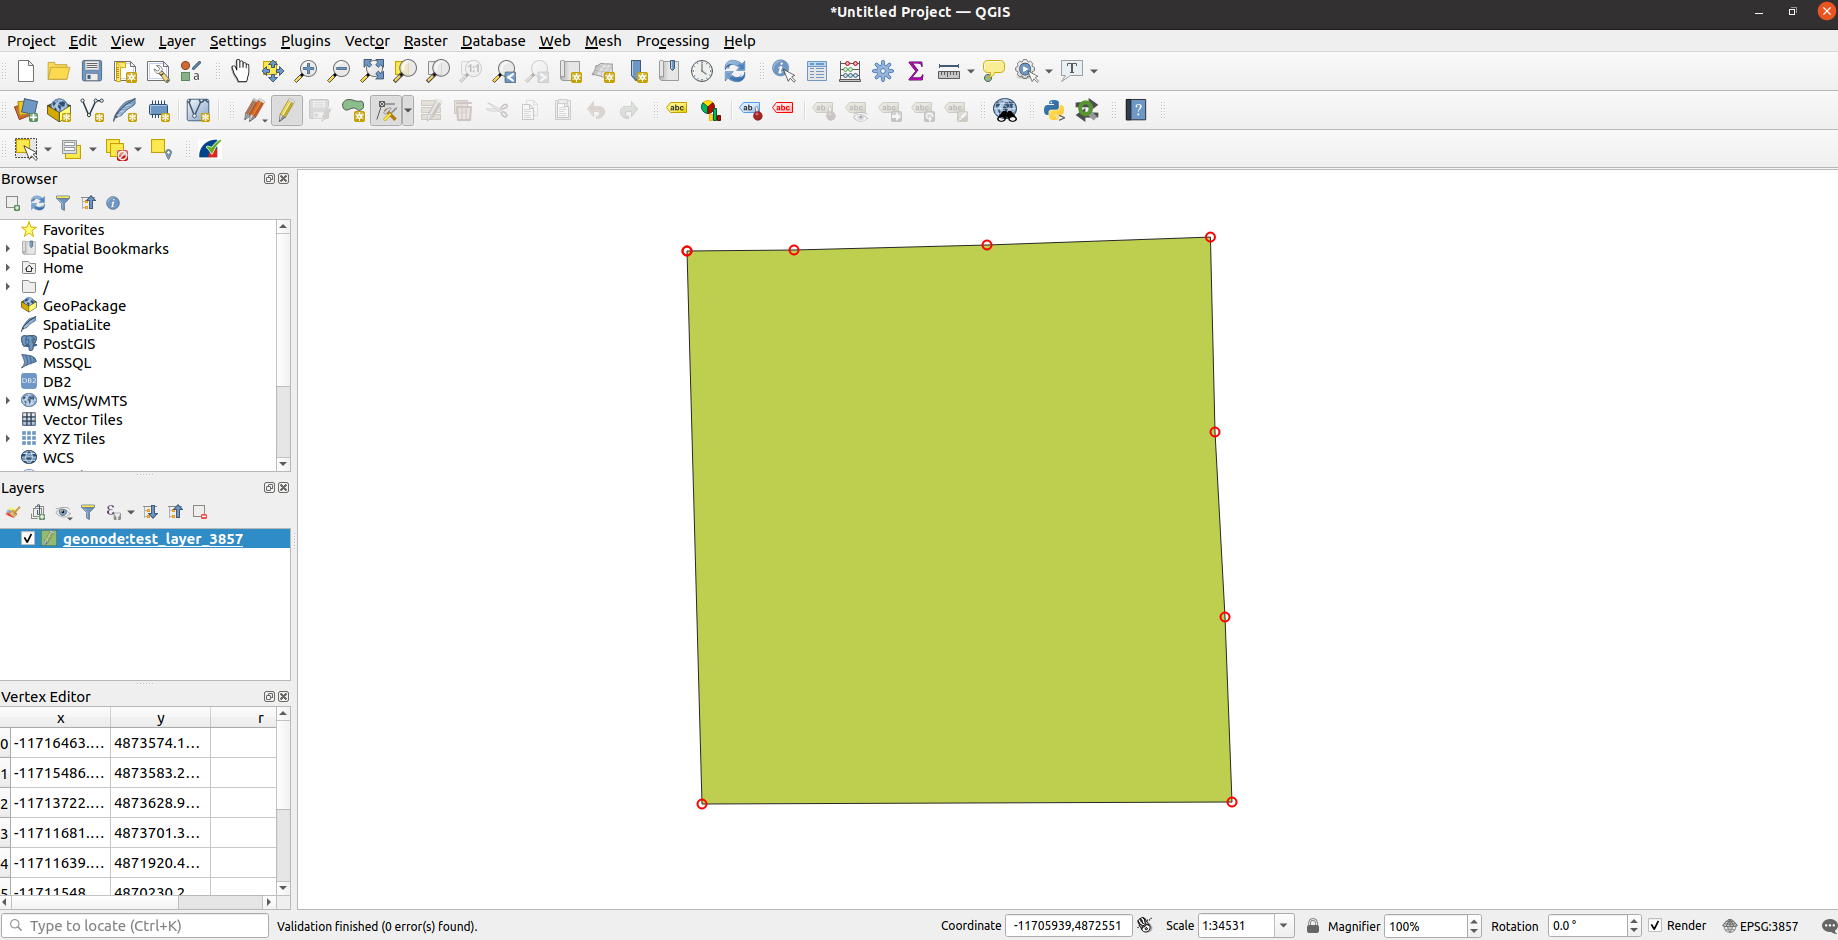
Refresh the QGIS Desktop connection, load the new layer and try modifying the geometries
Verify on GeoNode that the geometries have been committed; remember to clear the image browser cache in order to see the changes