Customize a geonode project UI
Homepage
Modify some text from the
site_index.htmltemplate
vim my_geonode/templates/site_index.html
{% raw %}
--- my_geonode/templates/site_index.html.org 2021-09-10 11:25:45.185777196 +0100
+++ my_geonode/templates/site_index.html 2021-09-10 11:28:09.255720387 +0100
@@ -9,11 +9,11 @@
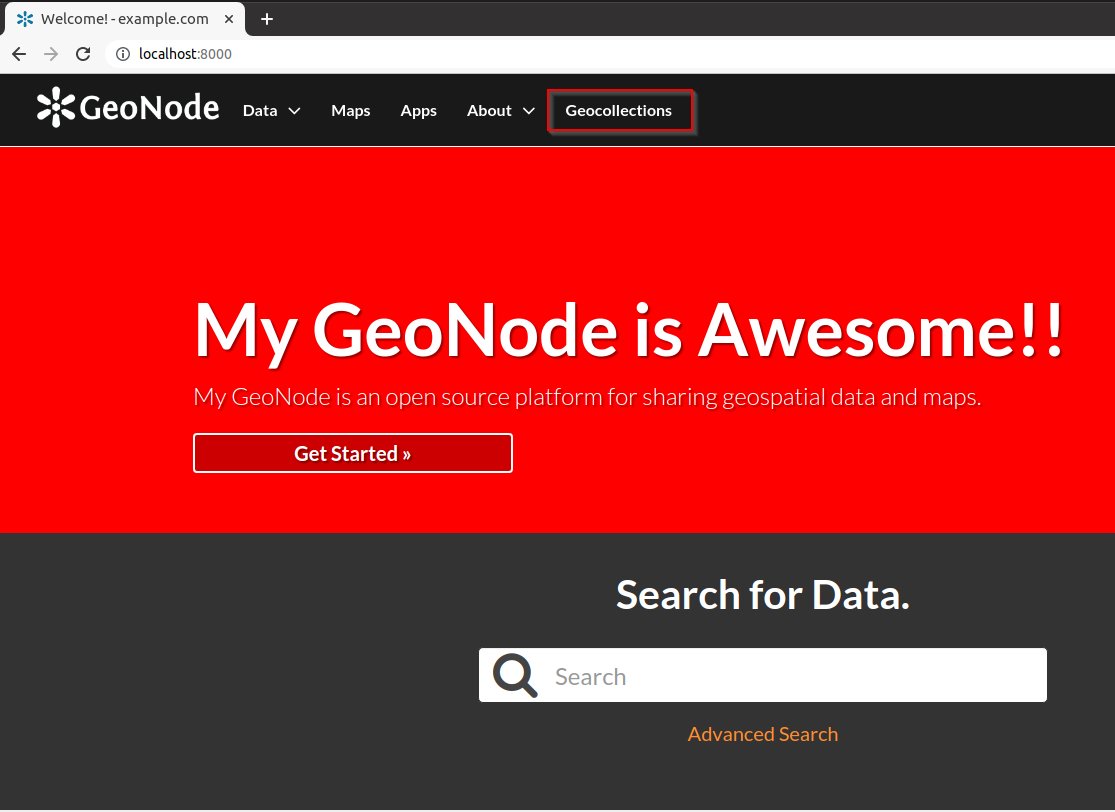
{% if custom_theme.welcome_theme == 'JUMBOTRON_BG' or not slides %}
<div class="jumbotron">
<div class="container">
- {% with jumbotron_welcome_title=custom_theme.jumbotron_welcome_title|default:"Welcome"|template_trans %}
+ {% with jumbotron_welcome_title=custom_theme.jumbotron_welcome_title|default:"My GeoNode is Awesome!!"|template_trans %}
<h1>{% trans jumbotron_welcome_title %}</h1>
{% endwith %}
<p></p>
- {% with jumbotron_welcome_content=custom_theme.jumbotron_welcome_content|default:"GeoNode is an open source platform for sharing geospatial data and maps."|template_trans %}
+ {% with jumbotron_welcome_content=custom_theme.jumbotron_welcome_content|default:"My GeoNode is an open source platform for sharing geospatial data and maps."|template_trans %}
<p>{% trans jumbotron_welcome_content %}</p>
{% endwith %}
{% if not custom_theme.jumbotron_cta_hide %}
@@ -73,4 +73,4 @@
</div>
</div>
{% endif %}
-{% endblock hero %}
\ No newline at end of file
+{% endblock hero %}
{% endraw %}

The Theme
To change the theme of our geonode-project we can act on the site_base.css file available in the my_geonode/my_geonode/static/css folder.
The file is empty so we can inspect elements of the home page with the browser’s developer tools and define CSS rules in there.
For example, if we want to change the background of the jumbotron, in this file we can add
.home .jumbotron { background: red }
Run the collectstatic management command in order to allow Django placing the static files on the correct folders.
./manage_dev.sh collectstatic
Once we refresh the page in the browser, we should see the change as follows:

Adding the .home CSS class is necessary in order to let the rule get precedence over the GeoNode’s ones.
We can check the rules by inspecting the element in the developer console.


The Top Menu
Let’s make some changes that will apply to the whole site. We can add a Geocollections entry in the top menu bar.
Edit the site_base.html file in the templates folder and uncomment the list item adapting the text as well from:
{% raw %}
--- my_geonode/templates/site_base.html.org	2021-09-10 11:46:44.763720387 +0100
+++ my_geonode/templates/site_base.html	2021-09-10 11:47:12.495720387 +0100
@@ -3,10 +3,7 @@
       <link href="{{ STATIC_URL }}css/site_base.css" rel="stylesheet"/>
 {% endblock %}
 {% block extra_tab %}
-{% comment %}
-Add Tab for Third Party Apps
 <li>
- <a href="{{ PROJECT_ROOT }}app">App</a>
+ <a href="{{ PROJECT_ROOT }}geocollections">Geocollections</a>
 </li>
-{% endcomment %}
 {% endblock %}
{% endraw %}
A GeoNode Generic Page
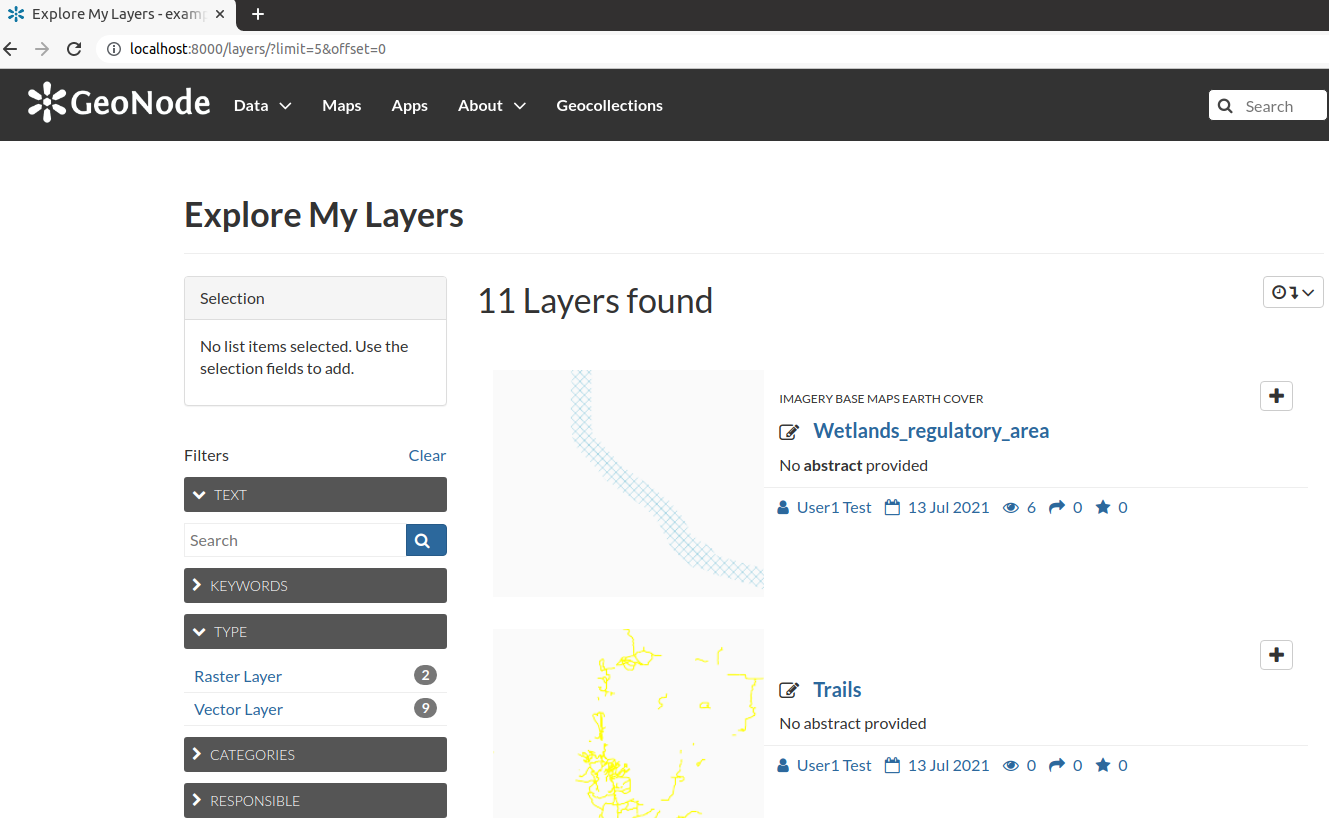
As you can see in the templates folder there are only the site_index.html and the site_base.html files. In order to customize another GeoNode page, for example the layers list page, you need to recreate the same folder structure of the GeoNode templates folder and add a file with the same name.
For the layers list page we can create a directory named layers inside the templates directory and a file named layer_list.html inside layers.
The changes made in this file will only affect the layer list page.
mkdir -p my_geonode/templates/layers/
cp /opt/geonode/geonode/layers/templates/layers/layer_list_default.html my_geonode/templates/layers/layer_list_default.html
vim my_geonode/templates/layers/layer_list_default.html

diff -ruN /opt/geonode/geonode/layers/templates/layers/layer_list_default.html my_geonode/templates/layers/layer_list_default.html
{% raw %}
--- /opt/geonode/geonode/layers/templates/layers/layer_list_default.html	2021-09-01 14:22:59.778823091 +0100
+++ my_geonode/templates/layers/layer_list_default.html	2021-09-10 11:55:32.195720387 +0100
@@ -2,7 +2,7 @@
 {% load i18n %}
 {% load staticfiles %}

-{% block title %} {% trans "Explore Layers" %} - {{ block.super }} {% endblock %}
+{% block title %} {% trans "Explore My Layers" %} - {{ block.super }} {% endblock %}

 {% block body_class %}layers explore{% endblock %}

@@ -11,7 +11,7 @@
   {% if user.is_authenticated and not READ_ONLY_MODE %}
     <a href="{% url "layer_upload" %}" class="btn btn-primary pull-right">{% trans "Upload Layers" %}</a>
   {% endif %}
-  <h2 class="page-title">{% trans "Explore Layers" %}</h2>
+  <h2 class="page-title">{% trans "Explore My Layers" %}</h2>
 </div>
   {% with include_type_filter='true' %}
     {% with header='Type' %}
{% endraw %}
Partial customization of a page
In the previous step we replaced the whole file. What if we only wanted to customize part of the page?
As explained in a previous page, we could simply inherit the whole page, and only change the block we want to customize.
At the top of the page we see:
{% raw %}{% extends "layers/layer_base.html" %}{% endraw %}
which is the parent page for both the original layer_list_default.html and our copy.
Let’s change the extends to point to the original file (not its parent):
{% raw %}{% extends "layers/layer_list_default.html" %}{% endraw%}
Now remove all the blocks except the one called body, and save the file.
You’ll see that the page is not changed, because we retained all the blocks from the new parent file.